A 1280 x 1024 thermal camera has four times the pixels of a 640 x 512 camera. That’s the number most thermal payload sales conversations open with, and it’s a real number. It’s just not the one that decides what you’ll actually see at 800 m.
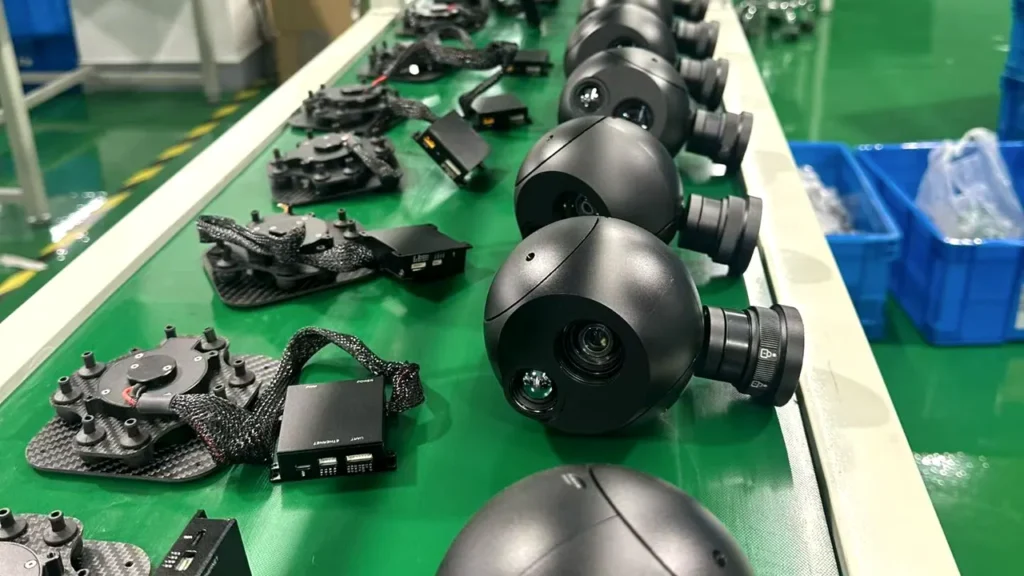
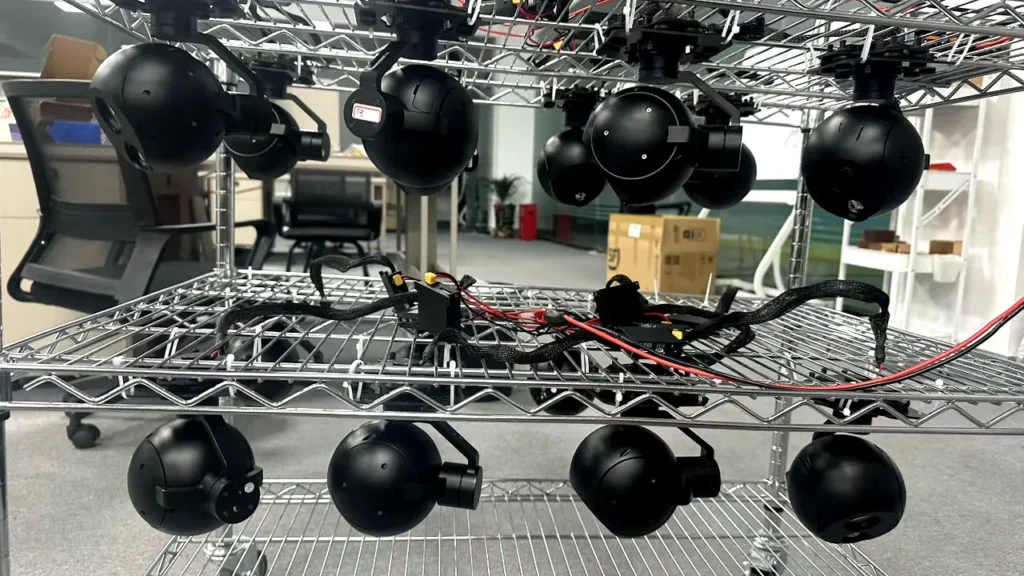
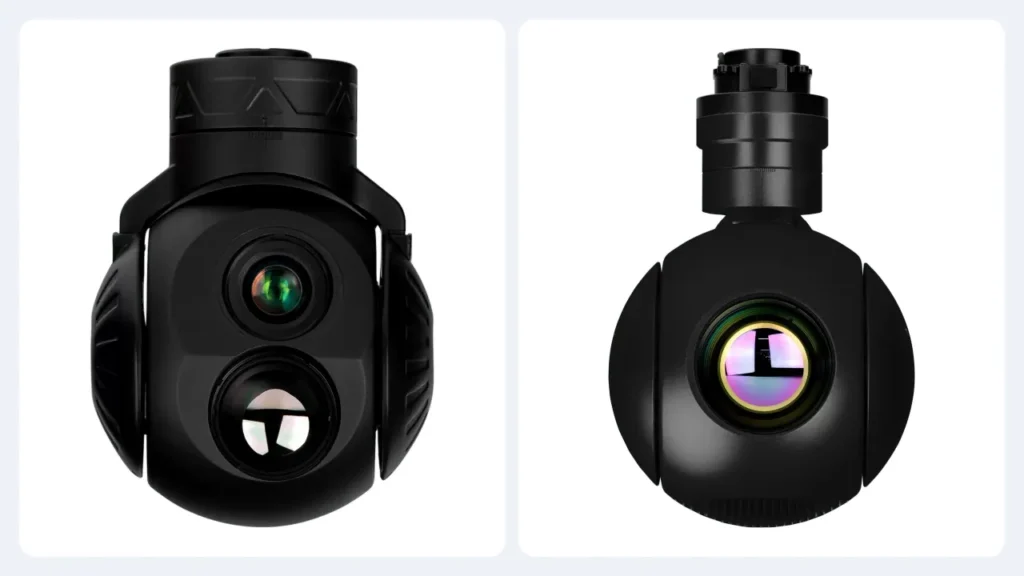
We build both. Our HQ-64DA carries a 640 x 512 thermal channel inside a 260 g two-axis head, and the HQ-125S is a thermal-only three-axis head with a 1280 x 1024 sensor. So this isn’t an argument for one of them. It’s a plain explanation of what the pixel count buys you, what it does not, and how to work out which one your mission needs.
The short version: the detector decides how finely the scene is sampled, and the lens decides how much of the scene lands on the detector in the first place. Get the lens wrong and a 1280 x 1024 camera loses to a 640 x 512 camera at the same distance. We’ll do the arithmetic a bit further down.
What thermal resolution actually means
How a thermal detector makes a picture
A thermal camera doesn’t see light. It measures the infrared radiation arriving from the scene and turns the differences into an image. The detector does the measuring. In an uncooled long-wave infrared (LWIR) camera it’s a microbolometer array, and every element in that array reports one number.
One number per element is the whole trick. A 640 x 512 detector has 327,680 elements. A 1280 x 1024 detector has 1,310,720. Everything else in this article follows from what those elements end up pointed at.
One thing worth saying early: the result isn’t a photograph of temperature. Surface emissivity, radiation reflected off nearby objects, the atmosphere and the sensor’s own behaviour all shape what you see. That’s why the same object can appear warmer or cooler than it really is [1].
What 640 x 512 and 1280 x 1024 actually mean
Both numbers describe how many elements the detector has, horizontal by vertical. Neither of them says anything about sensitivity, measurement accuracy or detection range.
| Specification | 640 x 512 | 1280 x 1024 |
|---|---|---|
| Horizontal elements | 640 | 1,280 |
| Vertical elements | 512 | 1,024 |
| Total elements | 327,680 | 1,310,720 |
| Relative element count | 1x | 4x |
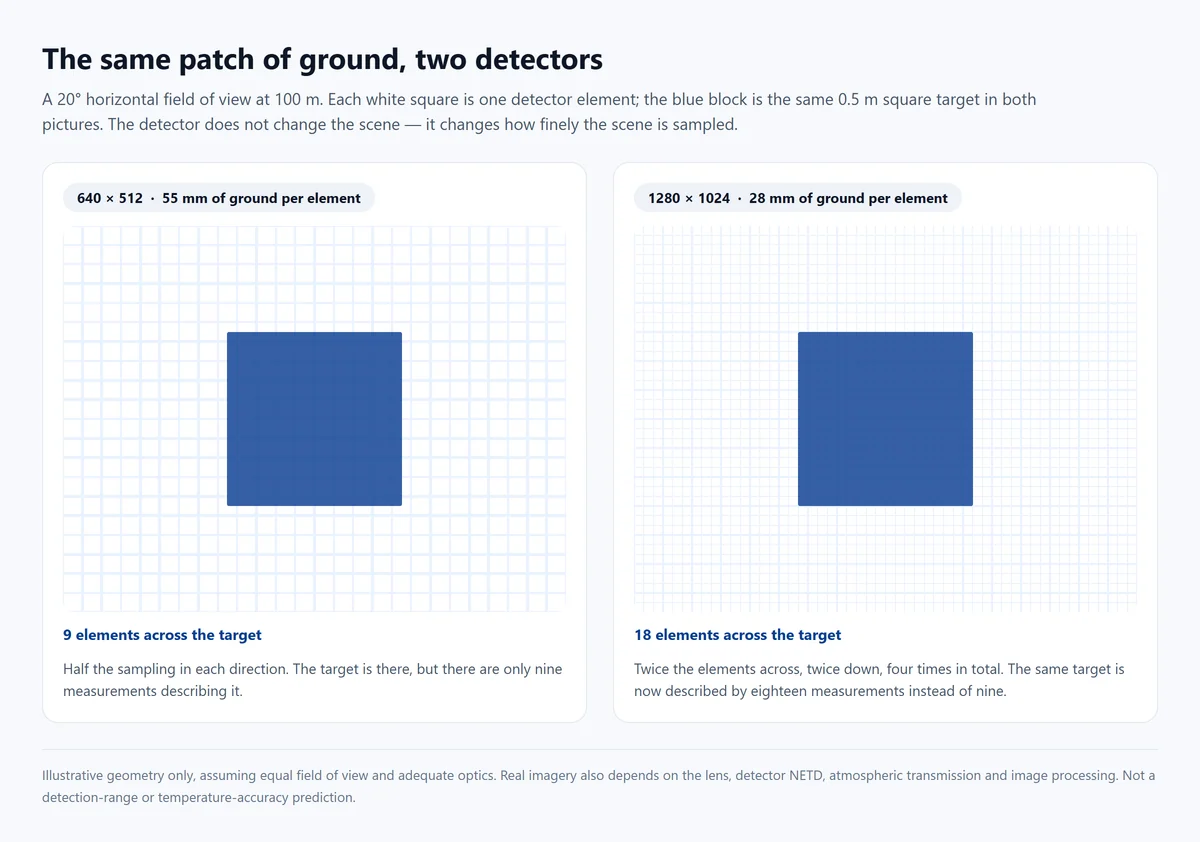
| Elements across the same target at equal field of view | baseline | about 2x |
The bottom row is the one to remember. Four times the elements doesn’t give four times the detail on a target; it gives about twice the sampling in each direction. If a 640 x 512 camera puts 5 elements across a car at 400 m, a 1280 x 1024 camera with the same field of view puts roughly 10 across it. That’s a genuine improvement, and you can see it. It’s just not a four-fold one.
Why more pixels does not automatically mean you see further
Resolution is one input into how far you can detect something. The others are the lens, the size of the target, the temperature contrast between the target and its background, the sensitivity of the detector, the image processing, and what the atmosphere does to the signal on the way in.
That’s why a 640 x 512 camera on a narrow lens can out-perform a 1280 x 1024 camera on a wide lens at the same distance. The wide camera is looking at a much bigger piece of the world with the same number of elements. Each element covers more ground, so the target lands on fewer of them.
The useful question is never “how many pixels does the detector have”. It’s “how many elements land on the thing I need to see, at the distance I need to see it from”.
640 x 512 thermal cameras: what they are good at
Where 640 x 512 sits in the range
640 x 512 is the workhorse resolution of industrial UAV thermal imaging. 327,680 elements is enough to put a useful number of samples on a person, a vehicle or a hot connection at the distances most inspection and surveillance missions actually fly. The detectors are also mature and well supported.
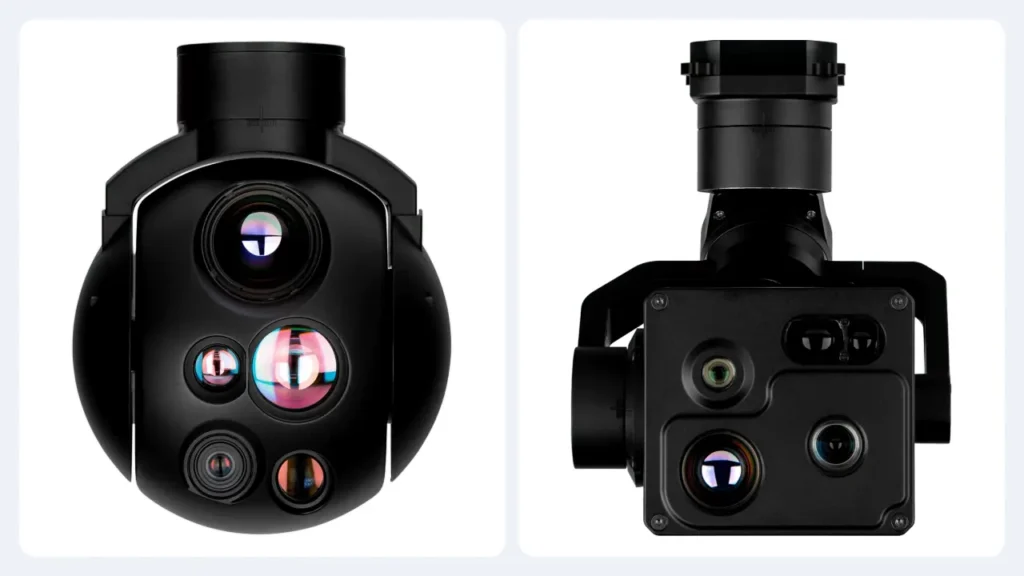
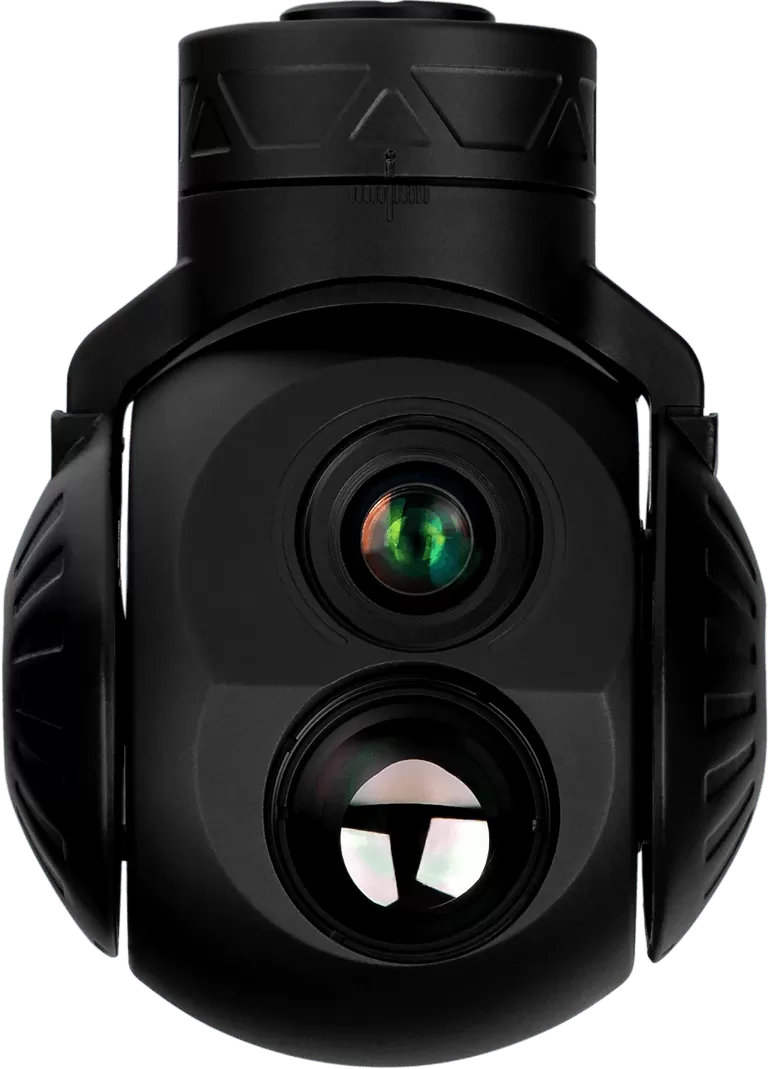
It’s also the resolution that lets you build a genuinely small payload. Our HQ-64DA is a two-axis head carrying a 2K visible channel and a 640 x 512 thermal channel with a 19 mm fixed lens, and it weighs 260 g. There’s no 1280 x 1024 way to get to 260 g today.
What you give up, honestly
Not much, if the mission matches. But three limits are worth naming:
- Linear detail. Half the sampling of a 1280 x 1024 detector in each direction. On a small target at long range, that’s the difference between a shape and a blob.
- Wide scenes. If you need to cover a large area and still resolve small features inside it, 640 x 512 runs out of elements sooner.
- Digital zoom. Zooming into a 640 x 512 frame lets you look closer at what you already recorded. It doesn’t add detail that the detector never captured. This is the single most misunderstood thing about thermal payloads, and we come back to it below.
When 640 x 512 is the right answer
Choose 640 x 512 when
- The target already fills enough elements at your working distance – check the arithmetic before you assume it doesn’t.
- Payload mass and power are tight, and the airframe has little to spare.
- You’re inspecting large, clearly separated targets: a transformer, a switchgear cabinet, a string of panels, a vehicle.
- Video bandwidth or onboard processing is constrained.
- You need a dual-sensor head rather than a thermal-only one, at a weight the aircraft can carry.
One practical note: before you specify a bigger detector, check whether a narrower lens would solve the same problem. Moving from a 19 mm to a 35 mm thermal lens changes the sampling across a distant target more than doubling the element count does. It also costs less in mass and money.
1280 x 1024 thermal cameras: what the extra elements buy
How the extra sampling shows up in the image
With the field of view held constant, a target covers about twice as many elements across and twice as many down on a 1280 x 1024 detector. That’s real information about the scene that a 640 x 512 camera simply didn’t record. Not interpolated, not upscaled, actually measured.
In practice it shows up as edges that hold their shape, smaller thermal features staying visible inside a larger scene, and more room to crop or zoom into a frame afterwards without the image falling apart.
The trade-offs you pay for
A 1280 x 1024 frame contains four times the elements of a 640 x 512 frame. At the same frame rate and bit depth that’s four times the raw data. It’s also four times the work for everything downstream: encoding, transmission, recording, and whatever onboard processing is running on it. Encoded bandwidth depends on compression and scene content, so the real figure is lower, but the direction is not in doubt.
Then there’s mass and cost. A bigger detector usually drags a bigger optical assembly behind it, and optical design and detector architecture both feed into the final price. There’s no rule of thumb here that survives contact with two competing quotations; compare complete configurations instead [2].
When 1280 x 1024 earns its place
Choose 1280 x 1024 when
- The mission needs detail on targets that are small, distant, or both, and a longer lens alone can’t fix the geometry.
- You need wide scene coverage and small-target detail at the same time.
- Someone downstream will crop, zoom or analyse the footage after the flight.
- The aircraft has the payload capacity, the power budget and the bandwidth for a bigger data stream.
- The difference between “something is there” and “what it is, and where exactly” changes the outcome of the job.
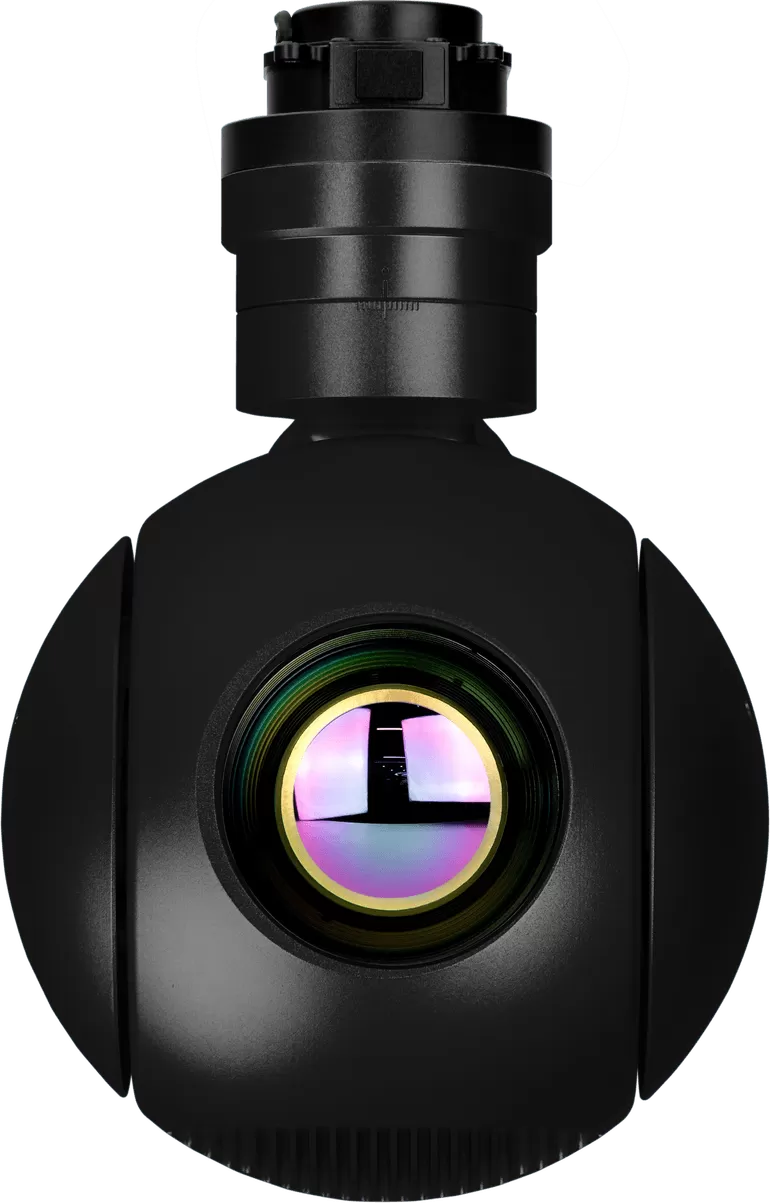
Our own example is the HQ-125S: a three-axis, thermal-only head with a published 1280 x 1024 LWIR sensor, a fixed 50 mm lens and a weight of 1 kg. Whether it’s the right head for a given aircraft depends on two things: the field of view that 50 mm gives you at your operating distance, and how much payload the airframe has left over [4]. That’s a real constraint, not a formality. A head that won’t fit under the aircraft is not a better head.
Digitally zoomed is not the same as higher resolution
Some payloads advertise 1280 x 1024 recording or 2560 x 2048 stills from a 640 x 512 detector, and the mechanism is digital zoom plus upscaling. It produces a bigger picture and often a sharper-looking one, because the processing is doing real work on contrast and edges. What it can’t do is recover detail the detector never sampled.
If a specification sheet quotes a resolution that’s a neat multiple of a smaller detector’s, ask what the native resolution is. It’s a fair question and the answer is usually in the manual.
The specifications that matter more than the element count
Four numbers decide far more about what a thermal payload will do for you than the pixel count does. None of them appear in a headline.
NETD and thermal sensitivity
What NETD measures
NETD, short for noise equivalent temperature difference, describes the noise floor of the imaging system, written as an equivalent temperature difference and normally quoted in millikelvin (mK). It’s the size of temperature difference that has to exist before the system can show it above its own noise.
Lower is better, under comparable test conditions. HITS publishes its uncooled LWIR thermal channels at NETD of 40 mK or better, and that’s the figure to compare between payloads.
What NETD is not
40 mK is 0.04 degrees. It isn’t a measurement accuracy of plus or minus 0.04 degrees, and the two numbers get confused constantly. NETD says how faint a difference the camera can show you. Measurement accuracy says how close a temperature reading is to the truth, and that’s a completely separate specification, which most thermal payloads don’t have at all [5].
Two cameras should only be compared on NETD if the figures were obtained under reasonably equivalent conditions. Detector temperature, integration time, aperture and test target all move the number.
Where it shows up
In low-contrast scenes: a warm component against a background almost as warm, a person against sun-heated ground, a small temperature rise at the edge of a thermal anomaly. Lens transmission, aperture, calibration and image processing also affect how those differences read on screen. So a better NETD figure doesn’t automatically win the comparison, but it’s the specification that decides whether the faint differences are there at all.
Pixel pitch, focal length and IFOV
Pixel pitch is the distance between the centres of neighbouring detector elements, normally in micrometres. Together with focal length it sets how much of the scene each element sees.
Instantaneous field of view
IFOV is the angle one element covers. Smaller IFOV means finer sampling at any given distance, if the optics and detector can resolve the detail that implies.
IFOV (radians) ≈ pixel pitch ÷ focal length
It’s a simplification, but it’s the right one for a first pass. The important consequence is that IFOV improves when you lengthen the lens or shorten the pixel pitch, both of which happen independently of how many elements the detector has. That’s why the lens question and the resolution question can’t be separated.
What that works out to at 100 m
Take two cameras with an identical 20 degree horizontal field of view, and put a 10 cm target 100 m away. The scene width at that distance is:
scene width = 2 × 100 × tan(10°) ≈ 35.3 m
| Parameter | 640 x 512 | 1280 x 1024 |
|---|---|---|
| Horizontal field of view | 20° | 20° |
| Target distance | 100 m | 100 m |
| Approximate scene width | 35.3 m | 35.3 m |
| Ground covered by one horizontal element | 55 mm | 28 mm |
| Elements across a 10 cm target | 1.8 | 3.6 |
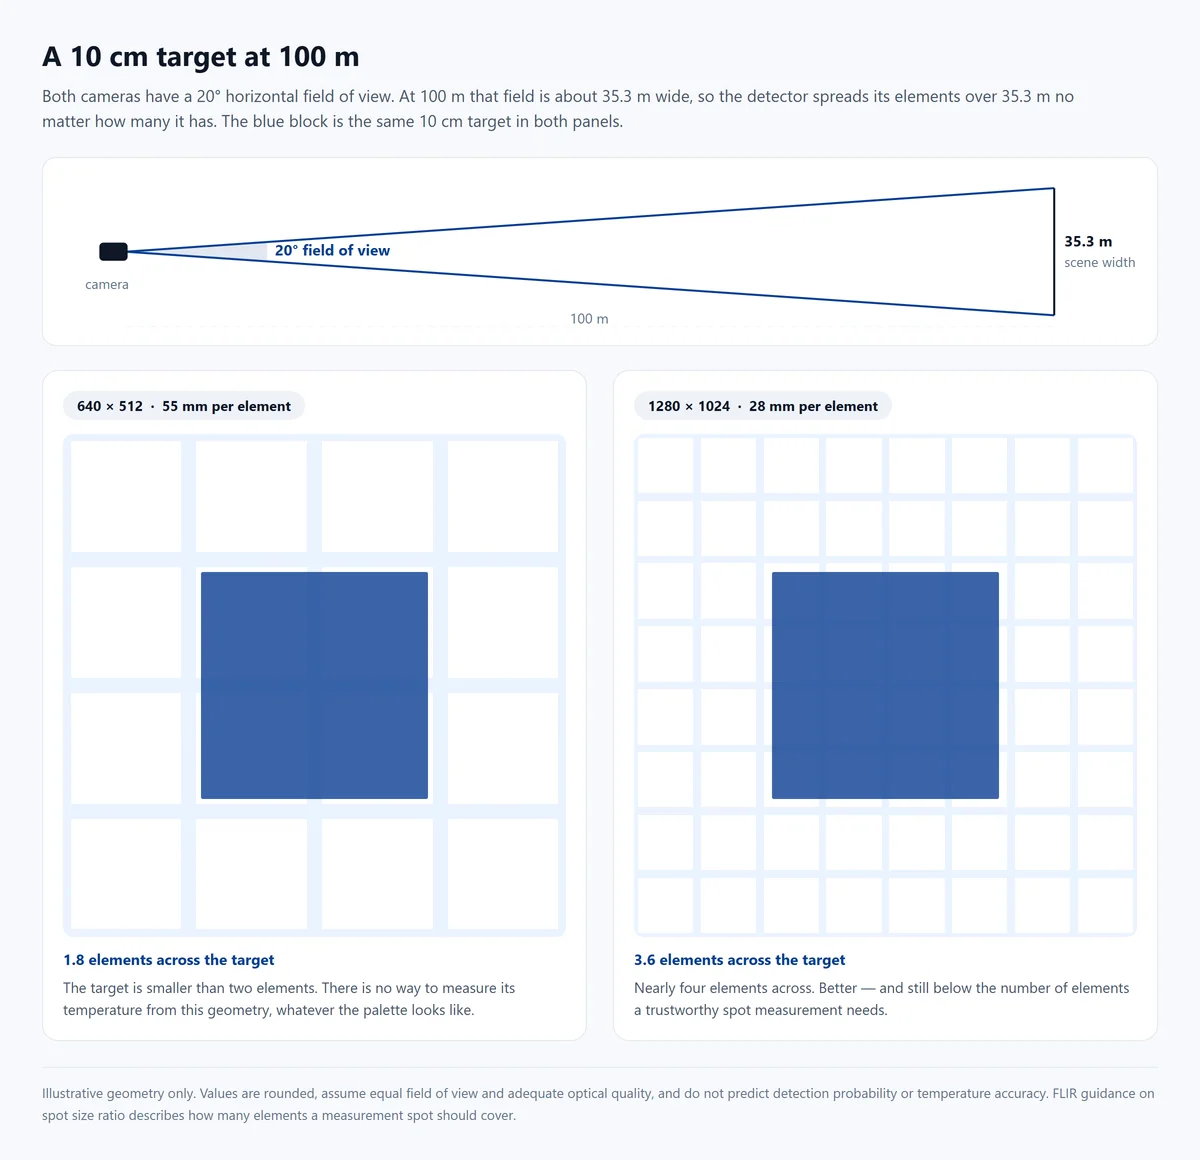
Two things are worth taking from that table. First, doubling the element count doesn’t double your range. It improves the sampling, and the further away the target is, the more an extra element or two matters. Second, and more important: 1.8 or 3.6 elements across a target is nowhere near enough to measure its temperature. FLIR’s guidance on spot size ratio is blunt about this, because a measurement spot needs to cover enough elements to be trustworthy [6].
Read that table as geometry, not as a range claim. The figures assume equal field of view, adequate optics, and no atmospheric loss. They’re a worked example of how sampling scales with distance. They aren’t a detection-range prediction and not a temperature-accuracy claim.
Frame rate and image processing
Frame rate decides how smoothly a moving scene is captured, and it matters more than people expect on a gimbal looking at something that’s itself moving. Image processing, such as local contrast enhancement, denoising and sharpening, can make a thermal image dramatically easier to read.
None of it creates spatial information that was never sampled. Digital enlargement is arithmetic: it redistributes the elements you already have. This is why a processed 640 x 512 image can look better than an unprocessed 1280 x 1024 one while containing less real detail. It’s also why comparisons should be run on original files with the settings documented.
Radiometric and non-radiometric cameras
This is the distinction that most often decides a project, and it has nothing to do with resolution.
A non-radiometric thermal camera produces imagery showing differences in received infrared radiation. It’s an excellent instrument for spotting that something is warmer than its surroundings, and for showing it to someone else. A radiometric camera adds calibrated temperature measurement: the ability to put a number on a point, an area, or a range.
If your project needs recorded temperatures, alarm thresholds, or a condition-monitoring report with figures in it, then radiometric capability is a requirement, and it has to be confirmed per model. A 1280 x 1024 detector doesn’t give you a radiometric camera, and a sharper thermal image isn’t evidence that measurements are accurate. Measurement also depends on emissivity, reflected temperature, distance, atmosphere and calibration [1].
So ask the direct question: does this specific model have documented radiometric measurement, over what range, with what stated accuracy, and calibrated under what conditions? If a supplier can’t answer in writing, treat the answer as no.
What this looks like on real missions
Abstract specification arguments get settled by use cases, so here’s how the choice falls out in the four jobs most of our thermal payloads go on.
Power line and substation inspection
Thermal inspection of electrical assets is about finding components running warmer than their neighbours: a loose connection, a load imbalance, a failing insulator. The targets are usually large and well separated, which is friendly territory for 640 x 512.
Where 1280 x 1024 starts to matter is when you want one wide pass of a substation that still resolves individual fittings, instead of flying closer or slower. And if the output is a report with temperatures in it rather than a picture with a hot spot circled, then the radiometric question has to be answered first. Resolution is downstream of that decision.
Industrial equipment monitoring
Tanks, pipework, motors, conveyor drives. Large components with broad temperature differences are exactly what a 640 x 512 detector handles well. Higher resolution earns its place when the interesting features are small relative to the scene, such as a valve body inside a wide plant view or a joint on a long pipe run, or when a wide shot has to serve as the record of the inspection.
Search and rescue
This is the case where people most often assume resolution is everything, and it isn’t. What decides whether you find someone is the temperature contrast between them and their surroundings, the vegetation or structure they’re under, the weather, the lens, the distance and the angle they’re being viewed from.
More elements help: a person at 600 m is a handful of elements at 640 x 512 and twice that at 1280 x 1024, which is the difference between noticing a shape and not. But no detector guarantees a find. A 640 x 512 payload flown at the right altitude with the right lens beats a 1280 x 1024 payload flown badly.
Environmental and maritime observation
Wide-area work such as watercourse discharge, forestry, coastal and offshore watching wants scene coverage, and a higher-resolution detector gives you more elements across that scene. It doesn’t remove the need to think about lens choice: a wide lens on a big detector and a narrow lens on a small one can end up covering similar ground.
Over water, add humidity and atmospheric transmission to the list, plus the aircraft’s own movement. A stabilised head is doing as much for the image in those conditions as the detector is [2].
How to choose a thermal gimbal camera for your UAV
Start from the smallest thing you have to see
Write down four things before you look at any datasheet: the smallest feature the mission must resolve, the distance you’ll typically be from it and the worst-case distance, how much temperature contrast you expect, and the conditions you’ll fly in.
That gives you a sampling target. Everything else, from detector and lens to stabilisation, is then chosen to hit it, rather than chosen first and justified afterwards.
Choose the lens and the detector together
Narrow field of view puts more elements on a small target and covers less ground. Wide field of view covers more ground and puts fewer elements on each thing inside it. There’s no configuration that does both, at any resolution.
This is also the cheapest lever you have. If a 640 x 512 head is falling short on sampling, the first question isn’t “should we buy 1280 x 1024” but “what does a longer thermal lens give us on this airframe”. Sometimes that closes the gap; sometimes it doesn’t, and then you have a real reason to go up a resolution.
Check the airframe before the datasheet
The payload has to fit inside the aircraft’s remaining mass, its mounting dimensions and its power budget, and the video output has to survive the downlink. A head that exceeds any of those isn’t a candidate, however good its numbers are.
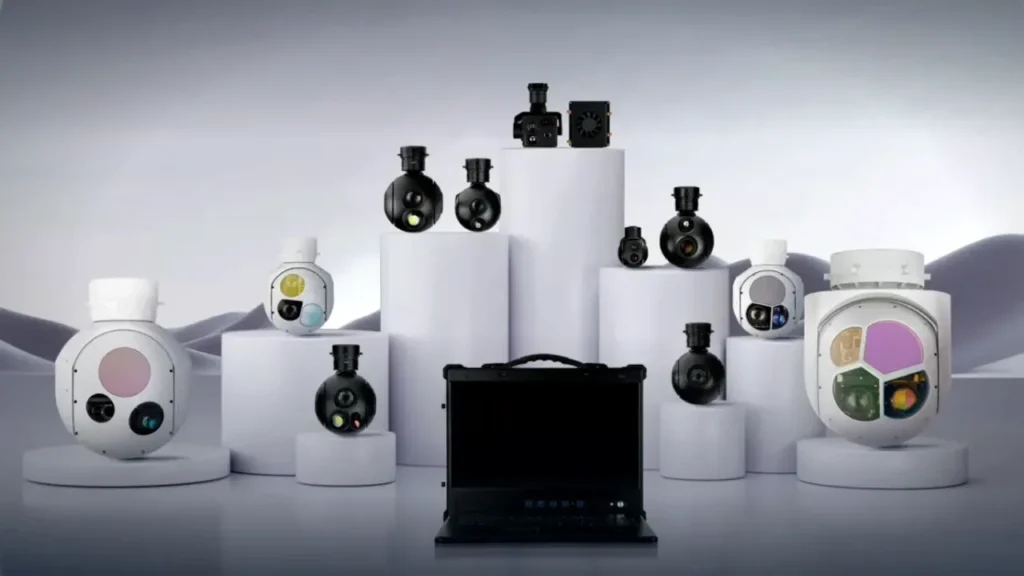
The HQ range is built so that gimbal heads share a stabilisation stack and a control protocol. That means a smaller 640 x 512 head and a larger thermal head can go on the same airframe with the same mount and cable run. That makes the resolution decision a business decision rather than a redesign [3].
Settle the measurement question early
If the deliverable is a number, such as a temperature, a threshold alarm or a trend over time, then confirm documented radiometric capability, measurement range, stated accuracy and calibration conditions before you compare anything else. If the deliverable is an image that shows where the heat is, a non-radiometric camera may be entirely sufficient. Money spent on measurement capability you won’t use is money not spent on resolution or lens.
How to compare thermal samples fairly
Insist on documented conditions
Manufacturer images are only useful when the distance, target size and conditions are attached to them. A close-range 640 x 512 image and a long-range 1280 x 1024 image placed side by side tell you nothing except which one was taken closer. If a supplier can’t say how far away the target was, the comparison is decoration.
Ask for the lens and detector data, not just the picture
Focal length, field of view, pixel pitch, NETD and the measurement conditions. Those five turn a pretty image into evidence. They also explain differences that have nothing to do with resolution, which is usually what has actually happened when one sample looks dramatically better than another.
Watch out for enhancement
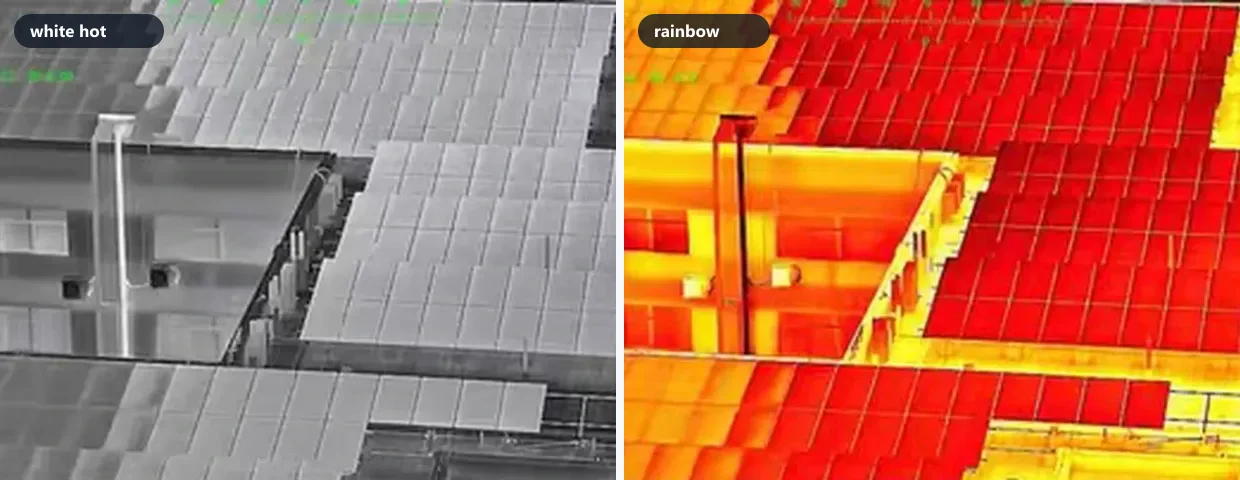
Automatic gain control, sharpening, denoising, digital zoom and display palettes all change how a thermal image looks. A sharper processed image doesn’t contain more thermal information. Ask whether the sample is native-resolution and what processing has been applied.
The sample pack worth asking for
Before selecting a supplier, request:
- Native-resolution thermal frames, with the lens and the distance recorded.
- Detector specifications including native resolution and pixel pitch.
- NETD figure and the conditions it was measured under.
- Video output format and frame rate.
- Radiometric documentation, if measurement is part of the job.
- Mechanical, electrical and integration data.
A sample run on your own aircraft, with your lens, in your conditions, is worth more than everything above, but it comes last, once the paperwork has narrowed the field.
Frequently asked questions
Is 1280 x 1024 always better than 640 x 512?
No. It gives you four times the detector elements, and about twice the sampling across a target at the same field of view. That’s a real advantage when targets are small or far away. But the lens, the thermal sensitivity, the distance and the mission decide whether that advantage turns into anything useful. A well matched 640 x 512 system will beat a badly matched 1280 x 1024 one on the same job.
How does NETD affect thermal imaging?
NETD is the noise floor of the imaging system: the smallest temperature difference that shows up above the system’s own noise. Lower is better under comparable conditions, and it’s what lets faint differences appear at all in low-contrast scenes. It isn’t a measurement accuracy figure, and the two should never be quoted interchangeably.
Can all thermal gimbal cameras measure temperature?
No. Some thermal payloads are imaging only and produce no calibrated temperature values at all. If your project needs recorded temperatures, alarm thresholds or a report with figures in it, you need a camera with documented radiometric capability, confirmed for that specific model. That means a measurement range, a stated accuracy and the calibration conditions it was established under.
Which resolution is better for power line inspection?
It depends on the geometry, not on a general rule. Large, clearly separated components at moderate range are well served by 640 x 512. A 1280 x 1024 detector helps when small fittings have to stay resolved inside a wide pass of a substation, or when the recorded frame has to serve as the inspection record. And if the output needs to contain measured temperatures rather than a marked image, radiometric capability matters more than either resolution.
What to take away
Resolution is a sampling specification, not a performance verdict. Four times the elements gives you about twice the linear detail across a target. Whether that detail reaches the target at all depends on the lens you put in front of the detector.
So work backwards from the job. Decide the smallest thing you have to see and the distance you have to see it from. Check whether a longer lens on the detector you already have closes the gap. If it doesn’t, and the airframe has mass and power to spare, then the extra sampling is worth paying for.
Then check the three specifications that quietly decide more than the pixel count: NETD, the lens, and whether the camera can actually measure temperature when your report needs a number in it.
The right thermal resolution isn’t the largest number on the datasheet. It’s the smallest one that still gets you the answer your mission needs.
References and technical sources
- [1] Teledyne FLIR – How does emissivity affect thermal imaging? Emissivity, reflected radiation and the reliability of temperature measurement.
- [2] Teledyne FLIR OEM – VGA vs SXGA thermal imaging: what higher resolution means for range, optics and AI. Detector resolution, spatial sampling, pixel pitch, field of view and integration trade-offs.
- [3] HITS – Thermal cameras. Manufacturer-published sensor options, lens configurations and payload specifications across the thermal range.
- [4] HITS – HQ-125S three-axis thermal gimbal camera. Manufacturer-published information for the 1280 x 1024 thermal configuration with a fixed 50 mm lens.
- [5] Teledyne FLIR OEM – Comparing the sensitivity of thermal imaging cameras and modules. Thermal sensitivity and how NETD should be interpreted.
- [6] Teledyne FLIR – Understanding distance to size ratio. IFOV, spot size and why a measurement target needs several elements across it.
- [7] Teledyne FLIR OEM – Choosing the right thermal imager for your integrated project. The difference between thermal imaging and calibrated radiometric measurement.
Technical note: HITS product figures are manufacturer-published specifications, not independent comparative test results. The 100 m calculation above is an illustrative piece of geometry, not a validated detection range or temperature accuracy claim. Radiometric capability varies by model and must be confirmed against current technical documentation before you specify it into a project.
Request thermal camera specifications and sample images
Tell us the smallest target you have to see, the distance you have to see it from, and whether the output needs measured temperatures. We’ll send the specifications and the original image samples that match your geometry, and tell you plainly if 640 x 512 is enough.
Related reading: the thermal camera range and the infrared camera payloads for UAVs. If you’re still choosing the sensing channel itself, EO vs IR vs EO/IR covers that, two-axis vs three-axis covers the mount, and how to choose an industrial UAV gimbal camera covers the payload as a whole. Once the head is chosen, the integration guide takes it through mounting, power, control and video testing.